Adobe Photoshop Tutorials
Speed Text Effect
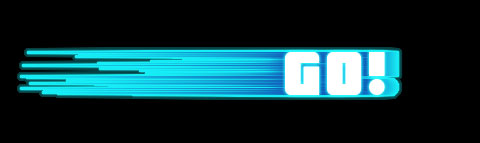
This time you are going to learn how to create this Speed Text Effect:
Step 1
Create a blank RGB document, it should be wide enough to fit the speed effect.
Fill the background with black.
Add your text in white.
Create a copy of your text layer.

Step 2
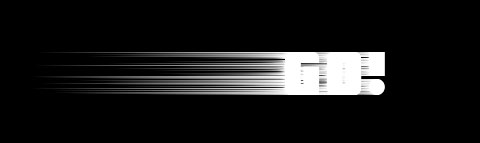
Use Filter --> Stylize --> Wind (from the right) on your original text layer 3 or 4 times until it looks something like this:
Step 3
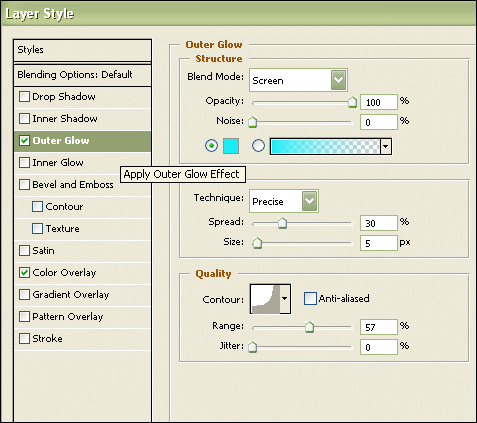
Go to the blending options of the layer and apply these Outer Glow settings:
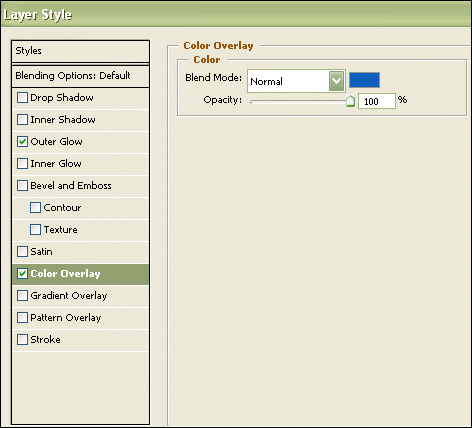
Next up, we need to apply this Color Overlay:
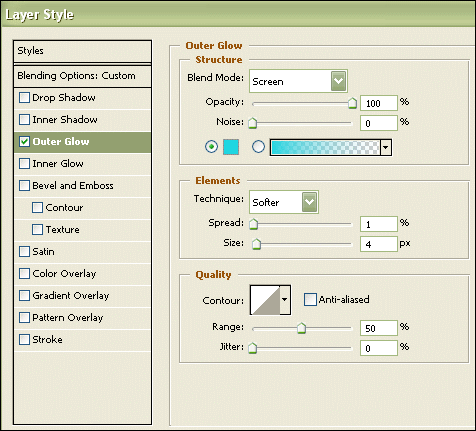
Step 4
Now activate your copied text layer and set an Outer Glow like this:
NOTE: You might want to experiment with the settings for the blending options to achieve different resullts.
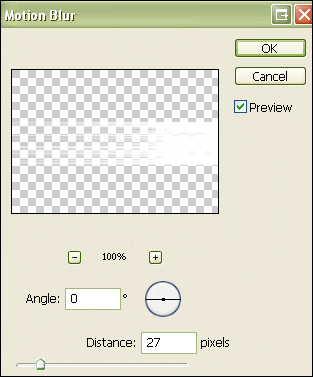
Step 5
Now apply some Motion Blur (Filter --> Blur --> Motion Blur)
Use these or similar settings:
You should end up with a speed text effect like this: